
Chat Widget
AI Hub Chat puts AI Hub’s chat widget on every page — the same thing Click to Chat’s AI Hub provider does on 2026.Q1 and later, through the same bottom-of-page include.
Turn it on
As an administrator, open Control Panel → Instance Settings → AI Hub → AI Hub Chat (Legacy Connector), tick Enabled, enter the Chatbot External Reference Code (from AI Hub’s Chatbots page), and Save. Every site’s pages then load AI Hub’s widget.
| Setting | Notes |
|---|---|
| Enabled | Off by default. |
| Chatbot External Reference Code | From AI Hub’s Chatbots page. |
| Guest Users Allowed | Off by default — guests get no widget. On, guests get it and chat anonymously, if the chatbot allows guest access in AI Hub. |
| AI Hub URL | Optional. Empty uses AI Hub Tokens’ URL; set it only if browsers reach AI Hub at a different address than the server does. |
Site scope
The settings are site-scoped, like Liferay’s own site settings: set in Instance Settings they apply to every site; a site’s Site Settings → AI Hub overrides them for that site (another chatbot, or off). Nothing is added in the Control Panel or in pop-ups, and nothing where Click to Chat already has its AI Hub provider — so the widget is never added twice.
How it behaves
- The chat answers as the signed-in user — the connector sends a per-user token, which AI Hub forwards back to the DXP, so reads follow that user’s permissions.
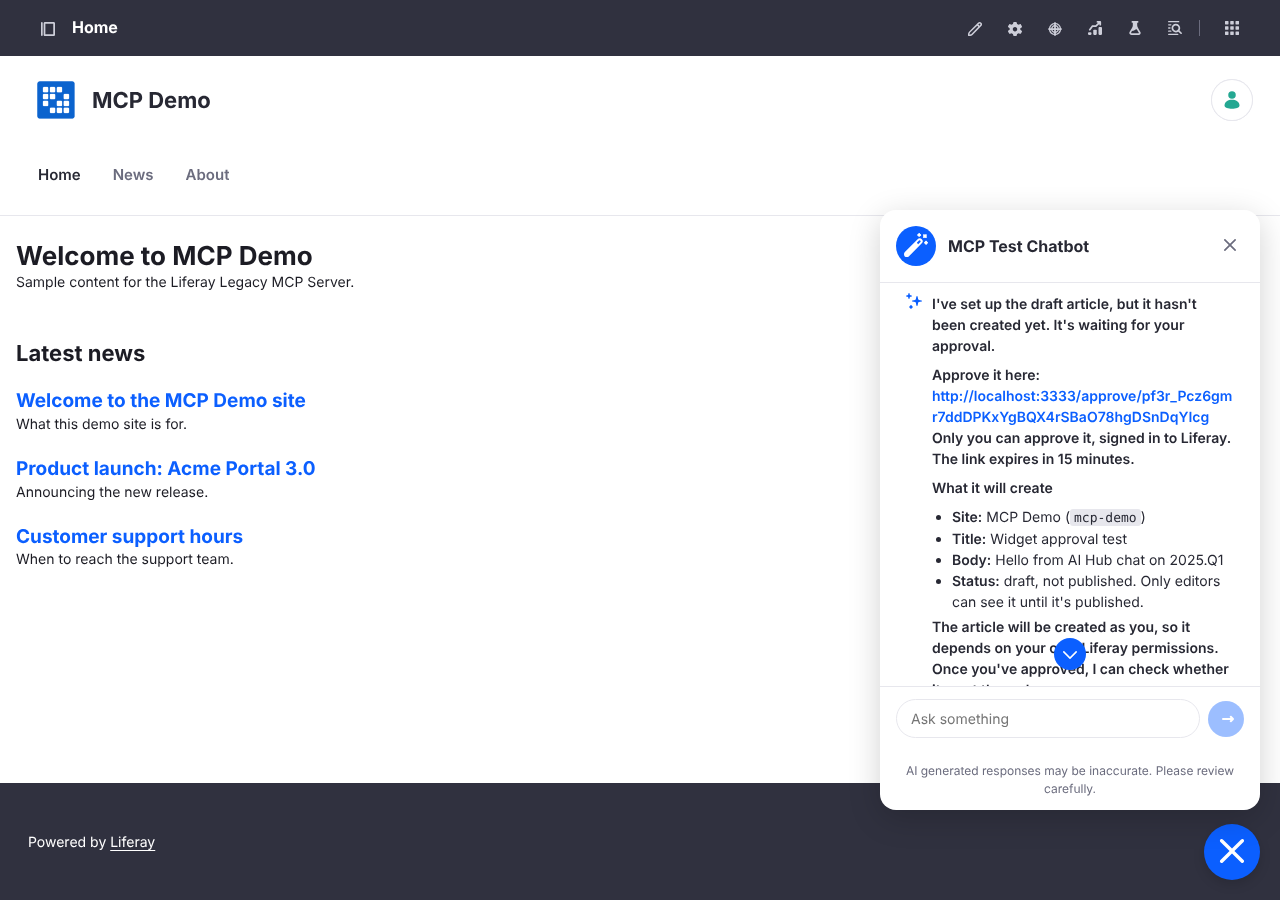
- With the MCP server connected, the chatbot’s agent can use its tools; writes come back as approval links the user confirms while signed in (shown in the screenshot above).
- With the proxy on (the default), the widget’s files still come from AI Hub but its calls go to this Liferay; see Security and In-editor Assistant → The proxy.